
How to put wordpress in a read only mode for migrations and maintenance – How to put WordPress in a read-only mode for migrations and maintenance is essential for keeping your website stable and secure during updates and data transfers. Ignoring this crucial step can lead to data loss, security breaches, and downtime. This guide delves into various methods, from plugin-based solutions to server-side configurations, providing a comprehensive approach to making your WordPress site read-only.
This comprehensive guide will equip you with the knowledge to confidently perform WordPress migrations and maintenance without jeopardizing your website’s integrity. We’ll explore different methods, offering practical steps and insightful comparisons to ensure you choose the best approach for your needs.
Introduction to Read-Only Mode
Putting your WordPress site into read-only mode is a crucial step before performing any significant updates or migrations. This mode effectively isolates your website from public access, preventing accidental data loss or errors during the process. It’s a vital security and stability measure that protects your website’s integrity.Performing updates or migrations on a live website without read-only mode can lead to various issues.
For instance, a failed update could render your website inaccessible or corrupt critical files, potentially leading to data loss. Similarly, a poorly executed migration can introduce errors that compromise your website’s functionality and security. Read-only mode safeguards against these risks, allowing for controlled updates and migrations without jeopardizing your site’s availability to visitors.
Importance of Read-Only Mode for Stability and Security
Read-only mode acts as a protective barrier, ensuring the stability of your website during sensitive operations like updates and migrations. It significantly reduces the risk of introducing errors or inconsistencies into your site’s codebase and database. The separation of the live site from public access allows for safe testing and implementation of changes without impacting users. This method provides a more controlled environment for managing updates, mitigating potential downtime, and preserving data integrity.
It’s a best practice for maintaining a reliable and secure website.
Read-Only Mode vs. Other Maintenance Methods
Implementing read-only mode provides a distinct advantage over other maintenance strategies. This table contrasts read-only mode with common alternatives, highlighting the superior protection and control it offers.
| Maintenance Method | Description | Pros | Cons |
|---|---|---|---|
| Read-Only Mode | Temporarily blocks public access to the website. | Maximum protection during updates and migrations; minimizes risk of errors; controlled environment. | Requires temporary downtime for users; might need additional configurations for specific scenarios. |
| Staging Environment | A separate environment mirroring the live site. | Allows for testing updates and migrations before deploying to live; reduces risk. | Requires extra setup and management; can be more complex to implement compared to read-only mode; not suitable for all updates. |
| Scheduled Maintenance | Planned downtime for specific updates. | Provides an opportunity for scheduled maintenance and updates. | Users may experience downtime; less control over the process than read-only mode. |
Read-only mode is a straightforward and effective solution for minimizing risks during sensitive operations on your WordPress site. By effectively isolating your website from public access, you can prevent unexpected errors and ensure a smooth transition during migrations and updates. This proactive measure strengthens your site’s stability and security, while minimizing potential disruptions for users.
Methods for Implementing Read-Only Mode
Putting your WordPress site into read-only mode is crucial for maintenance tasks and migrations without disrupting live content. This mode effectively prevents users from modifying any site data, ensuring a smooth and controlled process. This section explores various methods for achieving this, ranging from simple plugin installations to more intricate server-side configurations.Implementing read-only mode safeguards your site’s integrity during sensitive operations.
This approach is essential to minimize the risk of data corruption or errors during updates, backups, or migrations.
Plugin-Based Read-Only Mode
Plugins offer a user-friendly and often automated approach to implementing read-only mode. They typically handle the necessary modifications to prevent user interactions with the site’s content and functionalities. This method is generally preferred for its simplicity and ease of use, especially for users less familiar with server-side configurations.
- Many popular WordPress plugins provide read-only functionality. These plugins offer a straightforward interface to activate and deactivate read-only mode, usually with options for managing user access and other related settings.
WP-Offload Media Plugin Example
A popular plugin, WP-Offload Media, allows for the efficient management of media files. It also includes a read-only mode feature, providing a comprehensive approach to handling various site tasks. Following are the steps to implement read-only mode using WP-Offload Media:
- Install and activate the WP-Offload Media plugin.
- Access the plugin settings within your WordPress dashboard.
- Locate the “Read Only Mode” section, and enable it. You might find options to control access for specific user roles.
- Confirm the changes and refresh the page to apply the read-only settings.
Server-Side Configuration (htaccess)
Server-side configurations, such as using `.htaccess`, provide a more granular level of control over the site’s behavior. This approach allows for fine-tuning read-only mode and often integrates well with existing server-side setups.
Want to migrate your WordPress site or perform some maintenance without disrupting your visitors? Putting your site in read-only mode is crucial. This involves a few simple steps, like using a plugin or editing your .htaccess file. Knowing how to do this effectively frees you up to focus on other important tasks, like optimizing your pest control marketing budget.
For example, checking out top tips optimize pest control marketing budget can help you get more bang for your buck. Ultimately, a read-only WordPress site ensures a smooth transition during updates and maintenance, keeping your site running smoothly.
- A common server-side method involves modifying the `.htaccess` file to prevent user interactions with critical WordPress directories or files.
- This approach provides a direct way to restrict access to specific resources and ensure the site’s stability during maintenance activities.
- This method usually involves adding directives to block requests to particular parts of the site, effectively making them read-only.
Comparison of Methods
| Method | Pros | Cons |
|---|---|---|
| Plugins | Ease of use, user-friendly interface, often automated | Limited customization, potential for plugin conflicts |
| Server-side Configuration | High level of customization, often integrates with existing server setups | Requires server access and technical knowledge, potentially complex to implement correctly |
Plugin-Based Read-Only Mode Implementation
Plugin-based methods offer a user-friendly approach to temporarily restricting access to your WordPress site. These plugins often provide intuitive interfaces for setting read-only status, simplifying the process for maintenance or migration activities. This method is particularly valuable for situations where a more automated and controlled read-only environment is desired, and the configuration can be customized for specific use cases.Using a plugin streamlines the process of implementing read-only mode, automating the tasks required to make the site accessible only for viewing.
This approach avoids the need for complex manual configuration or the use of server-side scripts, providing a more accessible option for users unfamiliar with server-side administration.
Installing and Activating a Read-Only Plugin
Installing and activating a WordPress plugin for read-only mode is generally straightforward. The specific steps may vary depending on the chosen plugin, but common procedures include downloading the plugin file from the plugin repository, uploading it to the WordPress plugins directory, and then activating the plugin through the WordPress dashboard. The process usually involves navigating to the “Plugins” section within the WordPress admin panel, selecting the “Add New” option, and uploading the downloaded plugin file.
Once uploaded, the plugin can be activated.
Configuring the Plugin for Restricting User Access
Most plugins offer options to restrict user access to the site. These configurations typically involve enabling the read-only mode and adjusting the settings to control which users have access. This allows administrators to specify which roles or individual users can bypass the read-only restriction. Specific configurations may include adjusting access privileges for administrators, editors, or other user roles.
Allowing Specific Users Access
Plugins generally provide options to grant specific users access to the site, even when read-only mode is enabled. This allows maintenance personnel or administrators to perform necessary actions without affecting the site’s read-only status for other users. These configurations may involve adding specific user accounts or roles to an exception list within the plugin’s settings.
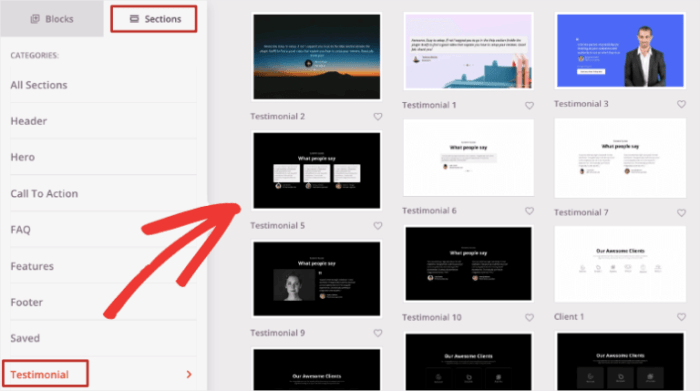
Popular WordPress Plugins for Read-Only Mode
- WP-Maintenance Mode: This plugin provides a simple interface to enable read-only mode, along with options to display custom messages to visitors. It is user-friendly, allowing site administrators to control access to the site with a clear indication of the read-only status to visitors. It offers various customization options for the message displayed, ensuring a consistent user experience.
- WP Super Cache: While primarily a caching plugin, WP Super Cache also offers read-only mode functionality. This integrated feature simplifies maintenance and migration tasks by allowing administrators to switch to read-only mode seamlessly. The plugin seamlessly integrates with caching strategies to ensure efficient site operation during read-only periods.
- SiteGuard: SiteGuard is a comprehensive security plugin that includes read-only mode functionality. Its comprehensive security features are combined with read-only mode support, allowing administrators to manage both security and maintenance tasks effectively. This provides a robust and versatile solution for managing site access and security during maintenance or migration.
Server-Side Read-Only Mode Implementation
Implementing read-only mode on the server-side provides a robust way to restrict access to your WordPress site’s database during maintenance or migrations. This method is often preferred for its control over access, avoiding potential issues from plugins. This approach ensures that no accidental changes can be made to your site’s data while the work is being done.This approach is highly effective in preventing unauthorized modifications to your website during maintenance or migration.
Quick tip: Putting WordPress into read-only mode is crucial for smooth migrations and maintenance. This ensures no unwanted changes during the process. Knowing how to optimize SEO in cybersecurity-relevant image use is also key for improving your website’s visibility and security, which can be linked to your WordPress site’s overall health. For instance, check out optimizing SEO in cybersecurity relevant image use for practical advice.
Ultimately, read-only mode protects your site from unexpected issues during sensitive updates or maintenance.
By disabling direct database access, you significantly reduce the risk of data corruption or unforeseen issues. It’s a proactive way to guarantee a smooth transition during sensitive operations.
Using .htaccess to Block Access, How to put wordpress in a read only mode for migrations and maintenance
The `.htaccess` file, often found in your WordPress installation’s root directory, is a powerful tool for controlling access to your site. It allows you to implement server-side directives without requiring complex server configuration changes. This approach is highly practical and versatile, allowing you to easily switch between read-only and read-write modes.A crucial step in implementing read-only mode through `.htaccess` involves blocking database access.
This method is highly effective for preventing unauthorized modifications during sensitive operations.“`apache
Server-Side Tools for Access Restriction
Various server-side tools, particularly Apache and Nginx, offer granular control over access. Understanding these tools is essential for fine-tuning your read-only mode implementation. These tools provide a high degree of control over access, making it possible to adjust restrictions to specific directories or files, if necessary.
- Apache: Apache’s configuration files (e.g., `httpd.conf` or `apache2.conf`) allow you to define directives to restrict access to specific directories or files. This level of control is invaluable when managing access to your site. Using Apache’s directives, you can block access to all files, except those that are needed for maintenance operations.
- Nginx: Nginx employs configuration files to block access to your site’s resources. Using Nginx, you can implement very specific rules for restricting access, which is essential for preventing unauthorized actions during maintenance or migrations. This flexibility is important for various types of websites and applications.
Reverting Server-Side Changes
Reverting server-side changes is crucial to restore your site’s functionality after the maintenance or migration is complete. This ensures your site is back in its operational state.Simply remove or comment out the directives in your `.htaccess` file or server configuration. This allows all users to access the site normally again.
Table of Code Examples for Different Server Environments
| Server Environment | Code Snippet | Description ||—|—|—|| Apache | `Order allow,deny\nDeny from all` | Blocks all access to the server || Nginx | `location / deny all; ` | Blocks all access to the root directory |
Read-Only Mode Considerations During Migrations
Putting your WordPress site into read-only mode before a migration is crucial for minimizing downtime and data loss. This mode effectively isolates the site from public access, allowing you to perform critical tasks like transferring files and databases without disrupting user experience. However, implementing read-only mode is just one part of a comprehensive migration strategy. Thorough planning and execution are vital to ensure a smooth transition.Implementing read-only mode during a WordPress migration requires a proactive approach that anticipates potential issues.
Careful planning, including backup strategies, staging environment testing, and data transfer procedures, are critical to a successful migration. This ensures the integrity of your data and minimizes any disruptions to your website.
Database and File Backup Procedures
Properly backing up your database and files before implementing read-only mode is paramount. Data loss during a migration can be catastrophic. This involves creating a complete and recent copy of all critical files and database information. These backups should be stored securely in a separate location, such as a cloud storage service or an external hard drive, to ensure data recovery in case of unexpected issues.
Knowing how to put WordPress into read-only mode is crucial for smooth migrations and maintenance. It prevents accidental data loss during updates and ensures a stable website. This is especially important when considering your Amazon brand advertising strategy, as discussed in depth in this article: why do i need to advertise on my brand on amazon.
Understanding how to put your site in read-only mode ensures your site’s integrity during crucial tasks, such as these brand building exercises on Amazon.
This precaution mitigates the risk of data loss or corruption during the migration process. The backups should be tested for integrity and should be readily available for restoration.
Staging Environment Testing Strategies
A staging environment is an essential component of a migration plan. It’s a replica of your live site where you can thoroughly test the migration process without affecting your live users. This allows you to replicate the live environment as closely as possible to ensure compatibility with the new server infrastructure. Testing should include database and file transfer operations to identify and address potential issues in advance.
Detailed logs of each step in the testing phase should be maintained for future reference and analysis.
Data Transfer Procedures During Read-Only Mode
Once the read-only mode is implemented, you need a well-defined procedure for transferring data to the new server. This procedure should detail the steps for migrating the database and files. A methodical approach is essential to avoid errors and data inconsistencies. This includes using appropriate tools and ensuring data integrity during the transfer process. A comprehensive plan for handling potential errors or data inconsistencies during the transfer process is also vital.
The plan should detail how to recover from unexpected errors.
Migration Checklist
A structured checklist helps maintain a clear overview of all tasks, ensuring nothing is overlooked. This ensures a streamlined and efficient migration process. This comprehensive checklist covers the tasks that need to be completed before, during, and after the migration process.
- Before Migration: Back up the database and files, create a staging environment, test the migration process on the staging environment, plan the data transfer procedures, and verify the availability of the new server resources.
- During Migration: Implement read-only mode on the live site, transfer the database and files to the new server, verify the functionality of the site on the new server, and monitor the process for potential errors.
- After Migration: Deactivate the read-only mode, test all functionalities, and restore the site to production mode. Verify that all content, functions, and links are working correctly. Conduct post-migration testing and review all logs for any discrepancies.
Read-Only Mode for Maintenance Tasks
Read-only mode is a crucial step in managing WordPress websites, particularly during maintenance tasks. It effectively isolates the site’s front-end from any changes you make on the back-end, preventing accidental data loss or site disruptions. This mode significantly reduces the risk of errors during updates and other crucial procedures. By restricting user access to the site’s content, read-only mode provides a safe environment for executing updates and migrations without impacting live site visitors.This section details specific maintenance tasks that can be performed safely while the site is in read-only mode, focusing on updating themes, plugins, and WordPress core.

It also provides a step-by-step guide to make routine maintenance more efficient.
Specific Maintenance Tasks
Read-only mode provides a secure environment for performing a variety of maintenance tasks. These tasks minimize the risk of disrupting the site’s functionality while updates are being performed. Common tasks include database optimization, cleaning up unused files, and user management.
Updating Themes and Plugins
Updating themes and plugins in read-only mode is a standard practice for ensuring a smooth transition. This process prevents conflicts or errors that might arise from simultaneous changes in the live site.
- Theme updates: A read-only mode allows you to update a theme without impacting live users. This prevents unexpected errors or disruptions in the website’s presentation, guaranteeing a stable and uninterrupted experience for visitors.
- Plugin updates: Similar to theme updates, updating plugins in read-only mode ensures that changes don’t affect the live website. This process prevents conflicts with existing code or configurations, maintaining the site’s integrity and functionality.
Upgrading WordPress Core
Upgrading WordPress core is a critical maintenance task, often involving significant code changes. Read-only mode provides an isolated environment to execute this update without causing issues to the live site.
- Backup your database and files: Before initiating any core update, ensure you have a complete backup of your database and files. This precautionary step guarantees that you can revert to a previous version if necessary.
- Deactivate all plugins: Deactivating all plugins is crucial to avoid conflicts during the update process. This prevents any unexpected interactions between the plugins and the core update.
- Update WordPress core: Following the standard WordPress update procedure in the read-only environment.
- Activate plugins: After the update, activate all plugins one by one to check for any incompatibility issues.
Routine Maintenance Tasks in Read-Only Mode
Implementing a structured routine for maintenance tasks, performed while the site is in read-only mode, significantly reduces the risk of disruptions and ensures smooth operation. This process guarantees the website’s efficiency and functionality.
- Database Optimization: Regularly optimize the database to improve performance. This involves removing unused data and optimizing table structures.
- File Cleanup: Identify and remove unused files, such as old backups or temporary files, to free up disk space and improve site performance.
- User Management: Review and manage user accounts, removing inactive or unnecessary accounts. This enhances security and ensures the website’s efficiency.
Security Best Practices for Read-Only Mode
Implementing read-only mode for WordPress is crucial for maintenance and migrations, but it introduces potential security vulnerabilities if not handled carefully. Proper security measures during and after the read-only period are paramount to protecting the site’s integrity and user data. This section Artikels key security best practices to mitigate these risks.
Identifying Potential Security Risks
Read-only mode, while necessary, can expose vulnerabilities if not implemented and managed correctly. Compromised access to the server during the read-only period, or insufficient protection against malicious attempts to exploit the site’s files or database, can lead to data breaches. Furthermore, if the read-only mode implementation is not foolproof, attackers might attempt to bypass the restrictions and gain unauthorized access to the system.
Securing the Site During the Read-Only Period
Protecting the site during the read-only period requires a multi-layered approach. This includes robust access control measures to prevent unauthorized access to the server hosting the WordPress installation. This might involve temporarily disabling unnecessary services or configuring firewalls to restrict access to specific ports or IP addresses. Regular security audits and vulnerability assessments are crucial during this phase to identify and address potential weaknesses.
Protecting Against Unauthorized Access
Preventing unauthorized access to the site’s files and database is essential. Strong passwords for all accounts accessing the server are critical. Employing two-factor authentication (2FA) adds another layer of security, significantly reducing the risk of unauthorized access even if a password is compromised. Furthermore, regularly reviewing and updating security measures is essential.
Importance of Strong Passwords and Security Measures
Strong passwords and comprehensive security measures are vital for safeguarding the site against unauthorized access. Complex passwords, incorporating a mix of uppercase and lowercase letters, numbers, and symbols, are crucial. Avoid using easily guessable passwords, such as names, dates, or common phrases. Regular password changes, adhering to a strong password policy, are important security practices. The use of strong passwords and regular security audits are fundamental to preventing breaches during the read-only period.
Security Practices Comparison
| Security Practice | Description | Impact on Security |
|---|---|---|
| Strong Passwords | Using complex, unique passwords for all accounts. | Significantly reduces the risk of unauthorized access. |
| Two-Factor Authentication (2FA) | Adding an extra layer of security by requiring a code from a separate device. | Further enhances security, making it harder for attackers to access accounts even with a compromised password. |
| Regular Security Audits | Periodically reviewing the system for vulnerabilities. | Identifies and addresses potential weaknesses before they can be exploited. |
| Firewall Configuration | Restricting access to the server based on IP addresses and ports. | Limits the attack surface by blocking unauthorized access attempts. |
Troubleshooting Read-Only Mode Issues
Implementing read-only mode for WordPress maintenance or migrations is crucial, but potential problems can arise. This section details common issues and provides solutions to ensure a smooth transition back to normal operation. Understanding these troubleshooting steps is key to minimizing downtime and preventing data loss during sensitive tasks.Read-only mode, while a vital tool, can sometimes encounter unexpected roadblocks, particularly when dealing with plugin conflicts or server-side misconfigurations.
Thorough diagnosis and targeted solutions are essential to overcome these challenges.
Plugin Conflicts
Plugin conflicts are a frequent source of issues when transitioning to read-only mode. Plugins might rely on specific database interactions or file operations that are restricted during this mode. Identifying and resolving these conflicts is essential for a seamless implementation.
- Incorrect Plugin Compatibility: A plugin might not be compatible with the read-only mode configuration. Carefully review the plugin’s documentation or contact its developer for guidance on compatibility issues.
- Plugin Dependencies: Ensure all plugins required by the problematic plugin are functioning correctly. Missing or outdated dependencies can disrupt the read-only mode implementation. Update dependencies where necessary.
- Plugin Configuration: Certain plugins may have specific configurations that interfere with read-only mode. Review plugin settings for any read-only mode-related parameters or options.
Server Configuration Issues
Server configuration errors can also disrupt the read-only mode. Incorrect server settings can lead to unexpected behavior, hindering the migration or maintenance process.
- File Permissions: Verify file permissions for WordPress files and directories are set correctly. Incorrect permissions can prevent the read-only mode from being applied effectively.
- PHP Extensions: Check that necessary PHP extensions are enabled and working as expected. Certain PHP extensions may be essential for the read-only mode’s functionality.
- Database Connectivity: Ensure the WordPress database can connect to the server during read-only mode. Verify the database credentials and connectivity settings.
User Access Restrictions
User access restrictions are a crucial part of read-only mode. However, problems can occur if the restrictions are not implemented or maintained correctly.
- Incorrect User Roles: Double-check that the designated user roles have the correct permissions for read-only mode. Ensure only necessary users have access during the maintenance or migration phase.
- Access to Specific Pages: Ensure that pages or sections you want to be read-only are appropriately protected from modification. Users might be able to access pages intended to be read-only.
- Incomplete Restrictions: Make sure that all aspects of user access are restricted. An oversight in the user access configuration can cause unexpected access issues.
Reverting to Normal Access
After completing the maintenance or migration tasks, it is critical to revert to normal access. This ensures that your website functions normally again.
- Deactivate Read-Only Mode: Carefully follow the steps for deactivating the read-only mode. This step varies depending on the implementation method.
- Verify Functionality: After deactivating the read-only mode, thoroughly test the website’s functionality. Ensure all pages and features work correctly.
- Restore User Access: Restore user access rights to their original configuration to ensure normal site operation.
Epilogue: How To Put WordPress In A Read Only Mode For Migrations And Maintenance
In conclusion, implementing read-only mode for WordPress migrations and maintenance is a critical step in ensuring a smooth and secure process. By understanding the various methods, security considerations, and troubleshooting steps, you can confidently navigate these essential website tasks. Remember to always back up your data and test thoroughly on a staging environment before applying changes to your live site.