
How to customize your WordPress header sets the stage for a captivating journey into website design. From simple tweaks to elaborate transformations, this comprehensive guide will equip you with the knowledge and skills to elevate your WordPress site’s header. We’ll cover everything from basic adjustments to advanced techniques, ensuring your header is not just functional, but a stunning reflection of your brand.
This guide dives deep into the world of WordPress headers, examining different types, customization options, and practical steps for making your header truly unique. We’ll explore methods for modifying colors, images, logos, navigation menus, and social media links, all while emphasizing responsiveness for optimal user experience across various devices. You’ll gain a practical understanding of how to use themes and plugins to streamline your workflow, and how to overcome common issues.
Introduction to WordPress Headers
The WordPress header is the very first thing visitors see when they land on your website. It’s more than just a visual element; it acts as a crucial gateway, presenting your brand, guiding users through your site, and establishing the overall aesthetic. A well-designed header sets the tone for the entire user experience, influencing their perception of your website and potentially driving engagement.Headers are fundamental to website design, acting as a visual introduction and navigation hub.
They encapsulate your brand identity, often including a logo, navigation menu, and social media links. A custom header can significantly enhance your website’s visual appeal and user experience, making it a key element in website optimization.
Types of WordPress Headers
WordPress headers can be categorized into static and dynamic types. Static headers remain the same on every page of your site, offering a consistent brand experience. Dynamic headers, on the other hand, adapt based on the page being viewed, providing a tailored experience for each visitor. The choice between static and dynamic headers depends on your specific design needs and the level of customization you desire.
Common Use Cases for Customizing Headers
Customizing your WordPress header allows you to tailor the experience for different use cases. You can adjust the header to reflect promotions, seasonal events, or specific marketing campaigns. By changing the header’s design, you can subtly guide visitors toward particular products, services, or calls to action.
Importance of Responsive Design for Headers
Responsive design ensures your header adapts seamlessly to various screen sizes, from desktop computers to mobile phones. This is crucial for a positive user experience across different devices. A non-responsive header can lead to a cluttered or unusable interface on smaller screens, negatively impacting user engagement.
Basic Structure of a WordPress Header
A typical WordPress header usually includes several key components:
- Logo: The logo is a visual representation of your brand and helps establish immediate recognition. It typically appears prominently in the header, providing a visual cue for your brand identity.
- Navigation Menu: This menu guides visitors to different sections of your website, making navigation intuitive and user-friendly. Clear and concise menu items are essential for a positive user experience.
- Social Media Icons: These icons allow users to connect with your brand across various social media platforms. Including these links enhances brand visibility and promotes social engagement.
These elements work together to provide a comprehensive and user-friendly experience for visitors, guiding them through the website effectively.
Modifying the Header’s Appearance
Customizing your WordPress header’s appearance is a crucial step in branding and enhancing user experience. A well-designed header creates a lasting first impression and guides visitors seamlessly through your website. This section details various methods to modify the header’s visual elements, from background colors to text styles.Modifying the header’s look and feel can be achieved through a combination of WordPress themes’ built-in customization options and custom CSS.
This approach allows for precise control over the header’s design, enabling you to tailor it to your brand’s specific aesthetic.
Changing Background Colors and Images
Many WordPress themes provide options to alter the header’s background color directly within the theme customization panel. This typically involves selecting a color from a palette or entering a hex code. For more complex or dynamic backgrounds, consider using an image. If your theme supports it, you can upload a suitable image, often with options for background positioning and size.
Remember to select an image that complements your website’s overall design and is optimized for web use.
Modifying Text Styles
Text elements within the header, such as logo text, navigation labels, and tagline, can be customized. The customization options vary based on the specific theme, but commonly include font selection, size adjustments, and color changes. These modifications can greatly improve readability and consistency across the entire website.
Adjusting Spacing and Margins
Header spacing and margins directly impact the visual layout. You can modify these aspects through the theme customization options or via custom CSS. Appropriate spacing enhances the overall aesthetic appeal and ensures elements within the header don’t appear cramped or cluttered. Properly adjusting margins ensures elements align correctly with other website components.
Altering Header Height and Width
Modifying the header’s height and width is another critical design aspect. This can be accomplished through the theme’s customization options, usually found in a dedicated section for header settings. Careful consideration of height and width is crucial for visual balance and responsiveness across various screen sizes. The appropriate height and width should ensure the header is visible yet not overly prominent or distracting.
Incorporating Custom CSS
Custom CSS allows for extensive control over the header’s design, enabling you to go beyond the theme’s built-in options. For instance, you can use custom CSS to modify the header’s background color using hexadecimal codes, alter font styles, or customize the positioning of elements. Understanding CSS syntax is essential to effectively modify the header’s design.
Example of Custom CSS
A simple example of modifying the header’s background color using custom CSS:“`CSS.site-header background-color: #F05050; /* Example: a deep pink – /“`This CSS code targets the `site-header` element and sets its background color to a deep pink. You would typically add this custom CSS in a child theme’s style.css file or a custom CSS plugin.
Integrating Images and Logos
Adding custom images and logos is a crucial step in personalizing your WordPress header. This allows you to showcase your brand identity, products, or other key visual elements. This section will guide you through the process of uploading, aligning, resizing, and positioning images and logos for optimal display across various screen sizes.Visual elements are critical in establishing brand recognition and attracting visitors.
By incorporating custom images and logos, you can significantly enhance your header’s aesthetic appeal and convey a more professional and memorable impression.
Uploading and Inserting Custom Images, How to customize your wordpress header
To upload and insert custom images, navigate to the WordPress media library. Click the “Add Media” button. Choose the image file from your computer. Give the image a descriptive file name, and fill out any necessary details like alt text for accessibility and purposes. This step ensures proper identification and indexing of the image for search engines.
Once uploaded, you can use the image in your header by inserting it in the appropriate location.
Aligning Images and Logos
Various alignment options are available within WordPress’s visual editor. You can position your images and logos to the left, right, or center of the header. Carefully consider the visual hierarchy and balance when positioning elements. This ensures a visually appealing and coherent design. Experiment with different placements to find the most effective arrangement for your header.
Image Formats and Suitability
The optimal image format for your header depends on the specific needs of your website. Here’s a table outlining different image formats and their suitability for headers:
| Format | Description | Suitability |
|---|---|---|
| JPEG (JPG) | A versatile format supporting a wide range of colors and image details. | Excellent for photographs and images with complex details. Good for general use. |
| PNG | A lossless format ideal for images with transparent backgrounds or sharp lines. | Excellent for logos, icons, and graphics with transparency or sharp details. |
| WebP | A modern format that often offers smaller file sizes than JPEG and PNG with good quality. | Generally a good choice for images that need a smaller file size without sacrificing quality. Excellent for modern websites. |
| GIF | Supports animation and transparency. | Best for simple animations or images with transparent backgrounds. |
Resizing Images for Optimal Display
Resizing images is crucial for ensuring a positive user experience across different screen sizes. Images that are too large can slow down your website’s loading time, while images that are too small can look pixelated and unprofessional. Utilize WordPress’s built-in image editing tools or dedicated image optimization plugins to resize your images appropriately. Consider different screen sizes, from mobile phones to desktop computers.
The optimal size for an image should be determined based on the specific needs of the website, ensuring responsiveness across various devices.
Incorporating Custom Logos and Positioning
Custom logos are an essential element for brand recognition. They can be integrated into the header in a similar manner as other images. Carefully consider the logo’s size and position to maintain a consistent brand identity across your website. Consider the spacing and alignment of the logo to ensure a cohesive and balanced visual layout. This creates a seamless visual connection with the overall branding strategy of your website.
Customizing Navigation Menus
WordPress navigation menus are crucial for guiding users through your website. They act as the roadmap, allowing visitors to easily access different pages and sections. Customizing these menus enhances the user experience and strengthens your site’s overall design. This section will delve into creating, managing, and styling navigation menus within your WordPress header.
Creating and Managing Navigation Menus
WordPress offers a user-friendly interface for managing navigation menus. Within the WordPress dashboard, you’ll find a dedicated menu section. This allows you to create, edit, and arrange menu items. You can add new pages, posts, custom links, or even categories as menu items. This straightforward process makes it easy to structure your site’s navigation.
Figuring out how to customize your WordPress header can be a breeze. You’ll find tons of tutorials online, but knowing where to start can be tricky. Ultimately, understanding the different options for your header design is key. Considering your long-term financial security, exploring the best employee retirement plans is also a worthwhile endeavor. For example, understanding your options for best employee retirement plans can help you make informed decisions about your future.
Once you’ve got that sorted, you can then focus on the perfect WordPress header design that matches your brand and website.
Customizing Menu Items
Menu items aren’t just about links; you can tailor them to perfectly match your website’s aesthetic. You can modify the text displayed for each menu item. This allows you to use more descriptive or engaging text, improving user understanding. Additionally, you can add icons to enhance visual appeal and provide immediate recognition for menu items. For instance, an icon for a “Contact Us” menu item might be a phone or envelope symbol.
Adjusting Menu Placement and Alignment
WordPress allows for flexible menu placement within the header. You can choose to align the menu horizontally or vertically, adjusting its position to complement the overall header design. The position and alignment of your menu can greatly influence the visual hierarchy of your header. Consider the layout of your header and how the menu will fit within that context.
Using Custom CSS to Style Menu Elements
Custom CSS is a powerful tool for refining the visual aspects of your menu. You can use CSS to alter colors, fonts, spacing, and other stylistic elements. For instance, you could change the background color of a menu item when it’s selected or highlight links to specific sections. The use of CSS allows for precise control over every visual detail, enhancing the overall design and user experience.
Examples of Different Menu Styles
Different menu styles can significantly affect the user experience. A horizontal menu, often used for sites with numerous top-level navigation options, presents items side-by-side. A vertical menu, ideal for sites with fewer top-level sections, presents menu items stacked vertically.
Adding Social Media Icons
Spice up your WordPress header with social media links! These icons not only enhance your site’s aesthetic appeal but also drive engagement and boost your online presence. Integrating them seamlessly into your header is a straightforward process, regardless of your technical prowess.Social media icons serve as prominent calls to action, encouraging visitors to connect with your brand across various platforms.
They are crucial for modern web design and contribute significantly to user experience, making your website more approachable and interactive. This section will guide you through the methods and considerations for incorporating these icons effectively.
Methods for Displaying Social Media Links
Different approaches exist for displaying social media links in your WordPress header. Plugins offer a user-friendly way to manage and display these links, while custom CSS provides more granular control over the look and feel.
Tweaking your WordPress header can significantly boost your site’s appeal. Understanding metrics like click rate vs click through rate ( click rate vs click through rate ) is key to optimizing those clicks. A well-designed header with clear calls to action will improve your click-through rates, ultimately driving more traffic and engagement to your website. This means strategic use of fonts, colors, and imagery in your header is critical for a successful WordPress customization.
Using Plugins
Many WordPress plugins simplify the process of adding social media icons. These plugins often offer pre-designed templates and options for customizing the appearance of the icons, making them an excellent choice for beginners and those seeking a quick solution. Plugins generally handle the underlying code and styling, allowing you to focus on choosing the right icons and linking them correctly.
Custom CSS
For those who prefer more control over the appearance and layout of their icons, custom CSS offers a powerful alternative. This method lets you fine-tune the icons’ size, color, spacing, and positioning to precisely match your website’s design. This approach is particularly valuable for sites with unique branding and design preferences.
Social Media Icon Examples
This table provides examples of various social media icons, their corresponding links, and potential styling options. These are just starting points; you can adjust them to match your website’s color scheme and branding.
| Icon | Link | Style |
|---|---|---|
| https://www.facebook.com/yourpage | Color: Blue; Size: 24px; Shape: Rounded | |
| https://twitter.com/yourhandle | Color: Light Blue; Size: 24px; Shape: Rounded | |
| https://www.instagram.com/yourprofile | Color: Dark Purple; Size: 24px; Shape: Rounded | |
| https://www.linkedin.com/in/yourprofile | Color: Dark Blue; Size: 24px; Shape: Rounded | |
| YouTube | https://www.youtube.com/@yourchannel | Color: Red; Size: 24px; Shape: Rounded |
Styling Social Media Icons
Ensuring your social media icons seamlessly integrate with your header’s design is essential. This involves careful consideration of color palettes, fonts, and overall aesthetics. Choose colors that align with your website’s theme, and ensure the icons’ size and spacing are consistent with the rest of the header elements. Aligning the icons’ style with the overall branding creates a cohesive and visually appealing experience for your website visitors.
Linking Social Media Icons
Correctly linking your social media icons to their respective platforms is crucial for functionality. Ensure the URLs you provide are active and direct users to the correct social media pages. A broken link can severely impact user experience and potentially damage your brand’s credibility. Double-checking the accuracy of the URLs is a vital step in the process.
Using WordPress Themes and Plugins: How To Customize Your WordPress Header
WordPress themes and plugins are powerful tools for customizing your website’s header. They provide pre-built styles and functionalities, saving you significant time and effort. Leveraging these resources allows you to create a professional and visually appealing header that aligns with your brand identity and website’s overall aesthetic.Themes and plugins often offer a wide array of header customization options that would otherwise require significant coding knowledge.
This means that even those unfamiliar with coding can easily create a unique and functional header for their website. The right theme or plugin can greatly simplify the process and ensure your header aligns seamlessly with your website’s design and functionality.
Popular WordPress Themes with Header Customization
Many themes offer built-in header customization options. Choosing a theme that fits your site’s needs is important. This selection process will ensure that the header matches your site’s aesthetic. Popular choices include themes like Astra, GeneratePress, and Divi, each with varying levels of header customization. Astra and GeneratePress, known for their flexibility and lightweight nature, are popular choices for their ability to adapt to diverse design needs.
Divi, on the other hand, offers a more extensive set of header options through its visual page builder.
WordPress Plugins for Enhanced Header Customization
Plugins extend the functionality of your WordPress site, allowing for advanced header features. A range of plugins can be utilized to extend the capabilities of your header, going beyond the features of the theme itself. Some popular plugins for header customization include SiteOrigin Header Builder, Custom Header Options, and the Header & Footer Options plugin. These plugins provide extensive control over header elements, including images, logos, menus, and social media icons.
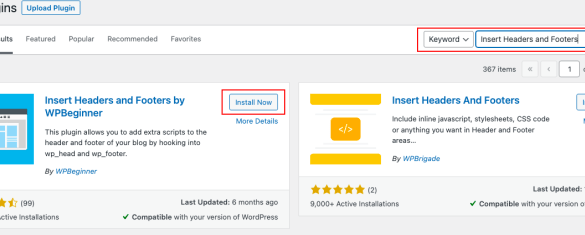
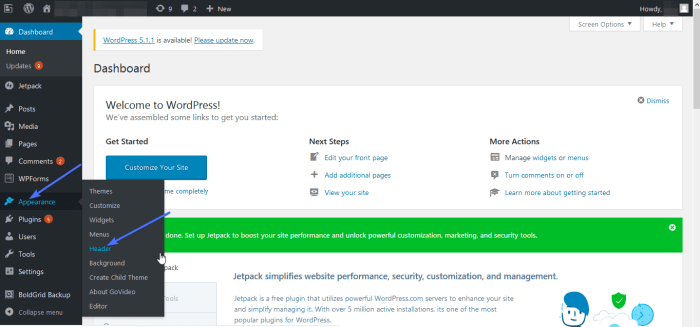
Installing and Activating Themes and Plugins
The process of installing and activating WordPress themes and plugins is straightforward. You can install them directly through the WordPress dashboard. From the dashboard, locate the “Appearance” menu, and then navigate to the “Themes” or “Plugins” section. From there, you can search for the desired theme or plugin, install it, and activate it. This typically involves clicking buttons labeled “Install Now” and “Activate.” Thorough reading of theme and plugin documentation is strongly recommended to understand the nuances of installation and activation.
Configuring Header Settings within Themes and Plugins
After installation, the theme or plugin will typically provide options for configuring its header settings. This often involves navigating to the theme’s or plugin’s options page, usually accessible via the WordPress dashboard. For example, within a theme, you might find options for adjusting header styles, uploading logos, and customizing menu placement. Each theme or plugin will have its own set of options and configuration steps, which are generally detailed in the theme or plugin’s documentation.

Comparing and Contrasting Theme and Plugin Options
Themes offer a comprehensive approach, providing a complete design framework. They typically handle most aspects of the header, including layout and style. However, themes might not offer the same level of granular control over every aspect of the header compared to plugins. Plugins, on the other hand, focus on specific functionalities, allowing for detailed customization of particular header elements.
Plugins can add features not available in themes, such as specific social media icon integration. For instance, while a theme might handle the basic header structure, a plugin can provide the capability to add custom header animations or dynamic content. This flexibility allows you to choose the solution that best suits your specific requirements.
Want to revamp your WordPress header? It’s surprisingly easy! First, find the right customization options within your WordPress dashboard. Understanding how to write a compelling brief for your website’s design is also crucial. A well-written brief ( how to write brief ) will ensure your header reflects your brand and goals. Then, you can select fonts, colors, and images that align with your brand identity.
This will make your website visually appealing and more engaging to visitors, ultimately boosting your website’s performance.
Troubleshooting Common Issues
Customizing your WordPress header can be a rewarding experience, but sometimes things go wrong. This section will equip you with the tools and knowledge to diagnose and resolve common problems, ensuring your header looks its best. From broken links to styling glitches, we’ll cover it all.Troubleshooting WordPress header issues often involves methodical steps. By systematically checking various components and applying appropriate solutions, you can pinpoint the source of the problem and restore your header to its intended functionality and aesthetic.
Broken Links
Identifying and fixing broken links in your header is crucial for maintaining user experience. A broken link can be frustrating for visitors and negatively impact your site’s . Check all navigation links and other clickable elements within your header.
- Verify Link Destinations: Ensure that the URLs associated with your links are accurate and active. Typos or incorrect URLs are common causes of broken links. Use your browser’s developer tools to inspect the links and confirm their destinations.
- Check Permalinks: If you’ve recently updated your WordPress permalinks structure, ensure your header links are configured correctly. Double-check the permalink settings in your WordPress dashboard.
- Review Plugin Conflicts: Certain plugins can interfere with your header links. If you’ve recently installed or updated plugins, temporarily deactivate them to see if the issue resolves. Deactivate plugins one by one to isolate the culprit.
- Inspect Header Code: Examine the HTML code of your header to verify that the links are properly formatted and linked. Pay close attention to any discrepancies or errors.
Missing Images
A missing image in your header can disrupt the visual appeal and create a less professional impression. There are several reasons why an image might disappear.
- File Path Errors: The file path specified in the header code might be incorrect or the image file has been moved or deleted from the server. Verify the file path is correct. Review the code for the image in your theme or plugin files.
- Image File Corruption: Sometimes, image files can become corrupted during upload or transfer. Try uploading the image again or checking the file integrity.
- Incorrect File Permissions: File permissions on your server might be preventing the WordPress system from accessing the image file. Check the file permissions and ensure they allow access.
- Theme or Plugin Conflicts: A conflict with a theme or plugin might be causing the issue. Temporarily disable or remove recently added plugins or themes to see if the problem persists.
Distorted Layouts
Distorted header layouts often stem from issues with CSS styling or incorrect theme settings. A misaligned header can make your website appear unprofessional and negatively affect user experience.
- Inspect CSS: Carefully examine the CSS styles applied to your header elements. Look for any conflicting or incorrect styles that might be causing the distortion. Check for typos or errors in the CSS rules.
- Theme Settings Review: Review the theme options and settings in your WordPress dashboard. Incorrect configurations or mismatched settings can lead to layout issues.
- Browser Compatibility: Ensure your header renders correctly across different browsers and devices. Test your header on various browsers (like Chrome, Firefox, Safari) and screen sizes (desktop, tablet, mobile). Use responsive design tools to ensure consistency across different screens.
- Cache Issues: Sometimes, browser caching can cause the header to display an outdated version. Clear your browser cache and cookies to force a refresh of the header.
Restoring Default Header Settings
If you’ve made significant customizations and are encountering problems, restoring the default header settings can be a useful troubleshooting step. This will help to identify if the issue lies within your custom modifications or the theme’s default settings.
- Theme Options: Check if your theme provides an option to reset the header to its default appearance. Look for a “Reset” or “Default” option in the theme settings.
- Backup and Restore: If you’ve made custom modifications to your header, create a backup of your website before attempting to restore default settings. This backup is crucial for reverting to the previous state if needed.
- Theme Documentation: Refer to your theme’s documentation for instructions on restoring default settings.
CSS Conflicts
CSS conflicts are a frequent source of styling problems. They arise when different CSS styles clash, leading to unexpected visual results.
- Identify Conflicting Styles: Carefully review the CSS styles applied to your header elements. Check for any duplicate or contradictory rules that might be causing the conflict. Use your browser’s developer tools to inspect the applied styles.
- Inspect Header Code: Examine the header code for any conflicting CSS classes or IDs. Check for conflicting styles from plugins or themes.
- Manage Plugin Styles: If using plugins with CSS, ensure they are compatible with your theme’s CSS and don’t override essential styles.
- Style Priority: Understand the order in which styles are applied. CSS stylesheets are often loaded in a specific order, with later styles overriding earlier ones. Adjust the order of your stylesheets if necessary to resolve the conflict.
Advanced Customization Techniques

Taking your WordPress header beyond basic customization requires understanding advanced techniques. These methods allow for more intricate designs, unique visual experiences, and enhanced user interaction. Mastering these skills will empower you to create a header that truly represents your brand and effectively engages visitors.Advanced techniques delve into the deeper layers of CSS and JavaScript, enabling dynamic and interactive headers.
This level of customization goes beyond pre-built theme options and empowers you to create a visually stunning and functional header that aligns perfectly with your website’s overall design and user experience.
Creating Unique Header Designs
A unique header design sets your website apart. Consider incorporating custom shapes, gradients, or intricate patterns. Experiment with different font styles, sizes, and colors to create a visually appealing and memorable header. Using a combination of background images, text overlays, and decorative elements can help create a distinct visual identity for your site. Remember to maintain a clear hierarchy of visual elements to ensure readability and maintain a cohesive design throughout the website.
Advanced CSS Techniques for Styling Headers
CSS provides the foundation for styling the header. Employing advanced selectors, such as pseudo-classes and pseudo-elements, allows for precise control over different header elements. For instance, you can use :hover pseudo-classes to dynamically change the appearance of elements on mouse interaction. This allows you to create visual cues that indicate a change in state or functionality.Advanced techniques involve nesting styles, creating custom animations, and applying responsive design principles.
This precise control allows for tailored visual experiences for different screen sizes. Examples include using media queries to adjust the header’s layout and styling based on the viewport width.
Incorporating Animations and Transitions
Animations and transitions elevate the header’s visual appeal. Consider smooth transitions for navigation elements, such as fading in or out of menu items. Use CSS animations to create captivating effects like a logo sliding into place or a background image subtly changing color.For instance, you could use CSS transitions to smoothly change the color of a header button when the user hovers over it.
Animating the appearance of the header as the user scrolls down the page adds an engaging touch, emphasizing the main content and enhancing the overall user experience.
Using Custom JavaScript for Enhanced Interactivity
JavaScript empowers dynamic interactions within the header. Implement interactive elements like a search bar, a sliding menu, or a responsive navigation bar that adapts to the screen size. You can use JavaScript to create a custom header search that dynamically filters results as the user types. This enhances user engagement by providing quick access to information and a more intuitive user experience.For instance, using JavaScript, you could create a dropdown menu that only appears when the user hovers over a specific menu item, improving navigation and streamlining the user journey.
Creating Responsive Header Designs
Responsive design ensures your header adapts seamlessly across various devices. Employ CSS media queries to adjust the header’s layout and styling based on the viewport width. This approach ensures your header looks professional on desktops, tablets, and mobile devices.A responsive header adapts its structure and content to fit the screen size of the device being used. This prevents the header from being overly complex on smaller screens or excessively simple on large screens, ensuring an optimal user experience regardless of the device.
This approach maintains a consistent brand identity and user experience across all platforms.
Conclusive Thoughts
In conclusion, customizing your WordPress header empowers you to craft a visually appealing and functional online presence. By understanding the various customization options and following the practical steps Artikeld in this guide, you can transform your website header into a powerful tool for branding and user engagement. Remember, a well-designed header is more than just aesthetics; it’s a crucial element in creating a user-friendly and memorable online experience.