
How to create a file upload form in WordPress? This comprehensive guide walks you through the process, from basic HTML structures to advanced security measures and WordPress plugin integration. We’ll cover everything you need to know, including handling various file types, displaying uploaded files, and ensuring a smooth user experience.
Building a robust file upload system in WordPress is crucial for many websites. From accepting user submissions to integrating media files, a well-designed form is essential. This guide will empower you to create a functional and secure file upload system that seamlessly integrates with your WordPress site, no matter your technical expertise.
Introduction to File Upload Forms in WordPress
File upload forms are crucial components of WordPress websites, enabling users to add various files, such as images, documents, or audio, directly to the site. They’re indispensable for functionalities like user profiles, product listings, and content creation. This flexibility makes them a valuable tool for building dynamic and engaging online experiences.File upload forms streamline the process of handling files, allowing users to select and upload content seamlessly.
These forms are integral to the functionality of a website, offering users a straightforward way to contribute multimedia elements and enhancing the overall user experience.
File Types and Limitations
The types of files that can be uploaded depend on the specific form and the website’s configuration. Commonly accepted file types include images (JPEG, PNG, GIF), documents (PDF, DOCX, TXT), and audio files (MP3, WAV). However, restrictions may apply based on the website’s needs or security policies. For example, a blog might restrict file sizes to prevent excessive storage demands.
Security Considerations
Security is paramount when dealing with file uploads. Malicious users could attempt to upload harmful files, such as viruses or scripts designed to compromise the website. Thorough validation of file types, sizes, and extensions is crucial to prevent such attacks. Implementing robust server-side checks is essential for added protection. For instance, scrutinizing the file content for malicious code or patterns before storage is a good practice.
User Experience Implications
The user experience is critical. A well-designed form should be intuitive and easy to use. Clear instructions, progress indicators, and error messages contribute significantly to a positive user experience. A form that is too complex or cumbersome can lead to frustration and abandonment. For example, a clear description of acceptable file types and size limits prevents confusion.
Basic HTML Structure
A fundamental HTML structure for a file upload form includes the ` ` element, along with other elements for labels, buttons, and feedback.
<form action="upload.php" method="post" enctype="multipart/form-data">
  <label for="fileInput">Choose a file:</label>
  <input type="file" id="fileInput" name="file">
  <input type="submit" value="Upload">
</form>
This example demonstrates a basic form that sends the uploaded file to a PHP script named `upload.php`. The `enctype` attribute is essential to correctly handle file uploads. Additional elements like error messages or progress bars can be added for a more refined user experience.
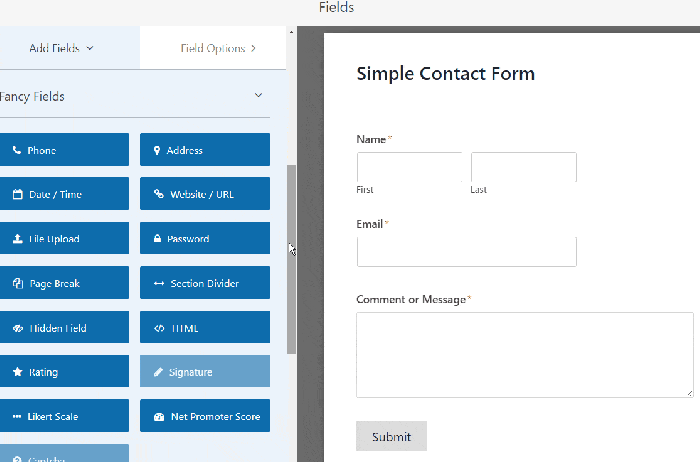
WordPress Plugins for File Uploads
WordPress offers a plethora of plugins designed to streamline the process of handling file uploads. These plugins often provide enhanced features beyond the basic WordPress functionality, catering to specific needs and complexities. They can improve user experience, simplify file management, and offer additional security measures.
Popular WordPress File Upload Plugins
Several popular and reliable plugins facilitate file uploads in WordPress. These plugins often differ in their features, pricing models, and ease of use. Choosing the right plugin depends on the specific requirements of your website.
- Media Library Enhancements: Plugins like “Advanced Custom Fields” and “WP Filebase” are designed to expand the functionality of the standard WordPress media library. They enable greater control over file organization, custom fields for storing additional information, and enhanced user interfaces.
- Dedicated File Upload Plugins: Plugins specifically dedicated to file uploads, such as “Easy File Upload,” offer more comprehensive solutions for handling files. They often provide features for organizing files, implementing various security measures, and allowing users to upload files directly into specific custom post types.
- Third-party Integrations: Some plugins integrate with external services, allowing users to upload files to cloud storage platforms like Dropbox or Google Drive. This approach enhances flexibility and offers more comprehensive storage options.
Comparison of Plugin Features
The features and functionalities of various file upload plugins can vary significantly. A critical comparison involves considering the range of file types supported, security measures implemented, user interface design, and available options for customization. Understanding these differences allows for informed decisions about which plugin best suits your project’s needs.
| Plugin | Pros | Cons |
|---|---|---|
| Easy File Upload | Simple to use, good for basic file uploads, various file type support. | Limited customization options, basic user interface, lacks advanced features. |
| WP Filebase | Excellent organization, custom fields, improved user experience for managing files within WordPress. | Steeper learning curve compared to simpler plugins, potential performance issues with very large file collections. |
| Advanced Custom Fields | Integrates seamlessly with WordPress, extensive customization options for adding custom fields to files, great for complex metadata management. | Requires familiarity with custom fields, can be overwhelming for basic file upload needs, may need additional plugins for specific file upload functionality. |
Installation and Configuration of Easy File Upload
This section details the process for installing and configuring the “Easy File Upload” plugin. This example assumes a basic WordPress installation.
- Plugin Installation: Navigate to the “Plugins” section in your WordPress dashboard. Click “Add New,” search for “Easy File Upload,” and install the plugin. Activate the plugin.
- Configuration: After activation, the plugin typically provides options to configure settings such as the maximum file size, allowed file types, and user roles with upload permissions. These settings are usually located within the plugin’s settings page.
- User Interface: The plugin’s user interface will be accessible through various parts of the WordPress website, such as a dedicated upload form for specific post types or as an integrated part of the media library.
Implementing File Uploads with Custom Code
Building file upload functionality directly into your WordPress theme or plugin offers granular control over the process. This approach allows for customized validation, handling, and storage of uploaded files, exceeding the limitations of pre-built plugins. This method empowers you to tailor the experience to your specific needs.
This section details the core steps and considerations for crafting a custom file upload form using PHP. We’ll cover creating the form, handling the upload in PHP, validating the file, and integrating it with WordPress. By implementing robust validation techniques, you ensure the security and integrity of your website.
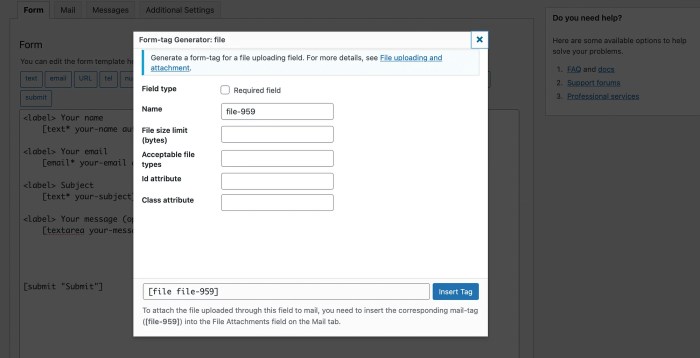
Creating the Form
The initial step involves designing the HTML form. This form will encompass input fields for file selection and, optionally, other relevant data. Ensure the form’s `action` attribute points to the PHP script responsible for handling the upload.
Handling File Uploads in PHP
The PHP script processes the uploaded file. Crucially, it checks for successful uploads and performs validation. The core PHP code snippet is presented below.
“`PHP
1024000) // 1MB limit
echo “File size exceeds the limit.”;
exit;Figuring out how to create a file upload form in WordPress can be surprisingly straightforward. While navigating those complexities, it’s worth considering the broader context. A recent report, new report reveals professional service firm employees criticize employers response to covid 19 as insufficient , highlights employee concerns about employer responses to the pandemic. Ultimately, mastering WordPress file uploads is a valuable skill for any website owner, so let’s dive into the details!
$filename = sanitize_file_name($file[‘name’]); // Secure filename
$destination = $upload_dir . $filename;if (move_uploaded_file($file[‘tmp_name’], $destination))
echo “File uploaded successfully.”;
else
echo “Error uploading file.”;Figuring out how to create a file upload form in WordPress can be surprisingly straightforward. Understanding your client’s needs is key, though, and that includes knowing who their competitors are. Knowing your client’s competitors helps you tailor the form to their specific needs, and that can be the difference between a form that’s easy to use and one that’s a frustrating mess.
This is crucial for a smooth user experience, which is vital in a well-designed WordPress site. By learning more about your client’s market through questions like these, you can build a more successful and targeted file upload form. You’ll want to dig deeper and ask them about their competitors’ offerings, too, to gain a real competitive edge. This understanding is vital to crafting a truly effective file upload form that meets their needs.
Ultimately, knowing how to create a file upload form in WordPress is just one piece of the puzzle; truly understanding your clients and their business is essential. Check out this great article on why asking clients about your competitors is critical for more insights.
else
echo “Error uploading file: ” . $file[‘error’];else
echo “File not found.”;?>
“`
File Validation Techniques
Robust validation is essential to prevent security vulnerabilities. The examples above illustrate fundamental checks for file types and sizes. Crucially, sanitize filenames using `sanitize_file_name()` to mitigate potential attacks. Thorough validation prevents malicious file uploads and protects your site’s integrity. Additionally, consider using a Content Security Policy (CSP) to further enhance security.
WordPress Hooks for Integration
Integrating custom file upload functionality into WordPress necessitates using hooks. These hooks allow you to intercept and modify actions at specific points within WordPress’s workflow. Employing hooks such as `wp_enqueue_scripts` and `wp_head` allows seamless integration with existing WordPress functionality.
Security Best Practices for File Uploads: How To Create A File Upload Form In WordPress
Securing file uploads in WordPress is crucial to protect your website and users from potential threats. Malicious actors can exploit vulnerabilities in file upload forms to introduce harmful code, compromise your site’s integrity, or even steal sensitive information. Implementing robust security measures is paramount for maintaining a secure and trustworthy online presence.
Protecting against malicious file uploads requires a multi-faceted approach, encompassing careful data sanitization, validation, and appropriate file handling. Understanding the potential risks and employing effective preventative measures is key to safeguarding your WordPress site.
Sanitizing User-Submitted Data
User-submitted data, especially file uploads, should always be thoroughly sanitized. This involves validating the file type, size, and content to prevent malicious code from being executed. Improperly sanitized data can lead to vulnerabilities like cross-site scripting (XSS) attacks or remote code execution (RCE). Validation and sanitization are fundamental to secure file handling.
Risks of Malicious File Uploads and Potential Exploits
Malicious file uploads represent a significant security risk. Attackers can exploit vulnerabilities in your file handling process to upload harmful files, such as:
- Executable Scripts: Files containing malicious code, designed to run commands on your server, can compromise your site’s functionality and potentially lead to data breaches.
- Hidden Scripts: Attackers might use hidden files or file extensions to execute scripts discreetly, potentially damaging your website’s database or server.
- Phishing Files: Uploaded files can be designed to deceive users into revealing personal information or downloading malware.
Methods to Prevent File Upload Vulnerabilities
Implementing robust security measures can prevent the majority of file upload vulnerabilities. A crucial step is to carefully validate the file type and extension. Also, limiting the types of files that can be uploaded can help protect against unexpected file types.
- File Type Validation: Restrict uploaded files to a predefined set of allowed extensions, like .jpg, .png, or .pdf. Avoid relying solely on the client-side validation, as attackers can bypass this mechanism.
- File Size Limits: Implement size restrictions to prevent the upload of excessively large files, which could overwhelm your server resources or indicate suspicious activity.
- File Content Filtering: Examine the content of the uploaded file to identify potentially malicious code or patterns.
Secure File Naming Conventions
Secure file naming conventions help prevent directory traversal attacks. Attackers might use these attacks to access files outside the intended upload directory.
- Randomized Names: Use a unique, randomly generated name for each uploaded file to mitigate the risk of predictable file names.
- Time-Based Names: Append a timestamp to the file name to make it more difficult to guess the file’s location.
- Preventing Directory Traversal: Use secure methods to prevent directory traversal attacks by ensuring file names don’t contain characters that could manipulate the directory path.
Comparing Validation Techniques, How to create a file upload form in wordpress
| Validation Technique | Strengths | Weaknesses |
|---|---|---|
| Whitelisting | Prevents unauthorized file types, improving security | Can be less flexible and may require updates if new allowed file types are needed. |
| Blacklisting | Easy to implement initially | Vulnerable to new file types or variations of existing malicious file types, potentially requiring frequent updates. |
| Content Filtering | Can identify malicious code patterns in file content. | Requires sophisticated algorithms, might flag legitimate files, and could be computationally expensive. |
Handling Different File Types
WordPress file upload forms need to be robust enough to handle various file types. Different file types have varying characteristics and sizes, and a form that only accepts specific types will severely limit users. This section explores the critical aspects of handling diverse file types, from recognizing limitations to organizing uploads effectively.
Properly handling file types is crucial for a smooth user experience and to prevent security vulnerabilities. Different file types require different handling techniques, including previewing, storing, and organizing. This ensures that users can easily interact with their uploaded files and that the system can efficiently manage them.
Identifying File Types
The crucial first step is identifying the file type accurately. This is accomplished primarily through MIME types. Each file type has a unique MIME type, a string that describes the file’s content. WordPress can utilize these types to determine the file’s suitability for various purposes, like displaying previews or preventing potentially malicious files. For instance, a `.jpg` image has a different MIME type than a `.txt` document.
Figuring out how to create a file upload form in WordPress can be tricky, but it’s a crucial step for any site needing file uploads. Knowing the best website builder for SEO is also important, because a solid platform can really help your site rank higher. For example, exploring options like best website builder for seo will give you a better understanding of the underlying structure.
Once you have a great foundation, you can move on to the nitty-gritty of WordPress file uploads, making your site more functional and user-friendly.
MIME Types and File Handling
MIME types are essential for correctly identifying and handling uploaded files. WordPress can leverage these types to enforce rules and restrictions. For example, if a form only accepts image files, the script can verify that the submitted file’s MIME type corresponds to an image type (like `image/jpeg`, `image/png`, etc.). This validation is a crucial security measure to prevent the upload of harmful files.
Limitations of Different File Formats
Different file formats have inherent limitations that need consideration. For example, a large video file might take longer to upload and process than a small image file. Audio files may need special handling for playback, while text files might require specific character encoding considerations. Understanding these limitations helps in designing a system that caters to diverse file types effectively.
For instance, certain file formats like `.exe` files are often disallowed due to security concerns.
Displaying File Previews
File previews are a valuable user experience. WordPress can leverage the identified MIME type to display appropriate previews. For images, a thumbnail or a smaller version of the image can be shown. For text files, a snippet of the content can be displayed. Appropriate previews are vital for users to know what they’re uploading and to ensure they’ve selected the correct file.
Organizing Files Based on Type or Category
Organizing uploaded files based on their type or category enhances usability and management. A user-friendly system might allow users to categorize their files (e.g., images, documents, videos). This organized structure facilitates finding and managing files later. A directory structure mirroring the categories could help, with subdirectories for different file types.
Example of MIME Type Handling
“`PHP
“`
This example demonstrates a basic check for image or video files using MIME types. More sophisticated checks can be implemented to handle various file types and their specific limitations.
Displaying Uploaded Files
Once you’ve successfully implemented file uploads in your WordPress site, the next crucial step is displaying the uploaded files to users. This allows them to easily view, download, and manage the content they’ve added. Proper display techniques enhance user experience and ensure files are readily accessible.
Displaying File Thumbnails
Visual representations of files, such as thumbnails, greatly improve user interaction. Thumbnails provide a quick preview of image files, facilitating easier file selection and management. For example, a gallery showcasing images uploaded by users would benefit greatly from thumbnail previews. WordPress’s image handling capabilities often handle thumbnail creation automatically.
Displaying File Previews
For file types beyond images, previews can be invaluable. Depending on the file type, this could involve displaying a portion of the document, a snippet of the audio, or a brief excerpt of the video. Such previews allow users to understand the file’s content without having to download the entire file. PDF previews are common, offering a user-friendly approach to examining documents.
Displaying File Metadata
Providing access to file metadata—information like file size, upload date, filename, and author—is a vital component for managing uploads. This information can be integrated into a table, a list, or a dedicated metadata panel. Displaying file metadata alongside the file itself improves usability and transparency.
Creating Downloadable Links
Crucial for file accessibility, downloadable links allow users to download the uploaded files directly. These links must be robust and secure, ideally using a unique download URL for each file to prevent unauthorized access. This feature is crucial for files that require immediate or later access.
Table of File Display Options
| Display Option | Visual Appeal | Use Cases |
|---|---|---|
| Thumbnail | Excellent for image previews, visually appealing, quick access | Image galleries, portfolio sites |
| Preview (e.g., PDF snippet) | Allows users to see a portion of the file before downloading | Documents, reports, or any file where preview is helpful |
| Metadata Display | Provides details like file size, type, upload date, author | File management, user tracking |
| Download Link | Enables direct file download, crucial for accessing content | All file types, offering immediate access to uploaded material |
| Note: Responsive columns allow the table to adjust to different screen sizes, enhancing usability. | ||
Advanced File Handling Techniques
Optimizing file uploads in WordPress goes beyond the basic form submission. Advanced techniques are crucial for handling diverse file types, sizes, and potential issues effectively. These techniques include image manipulation, cloud storage integration, large file management, and robust error handling. By incorporating these practices, you can ensure a smooth user experience and maintain a secure and efficient file upload system.
Image Resizing and Compression
Efficient image handling is essential for websites with frequent image uploads. Resizing and compressing images not only improves page load times but also conserves storage space. WordPress plugins and custom code can be leveraged to automatically resize images based on predefined dimensions or ratios. This process can involve libraries like GD or Imagick, allowing for adjustments to image quality and file size.
By optimizing image sizes, you can maintain high-quality visuals while improving website performance.
File Storage Solutions
Utilizing cloud storage solutions provides significant advantages for managing uploaded files. Services like Amazon S3, Google Cloud Storage, or Dropbox offer scalable storage, enhanced security, and accessibility features. Integrating these services with your WordPress file upload form allows for seamless file storage and retrieval. This approach can free up server resources and enhance overall system reliability. For example, when using S3, files are stored remotely, minimizing the load on your server and allowing for a more robust and scalable system.
Managing Large File Uploads
Large file uploads can strain server resources and potentially disrupt user experience. Implementing techniques to handle these large files is critical. Chunking the upload process is a common approach. Dividing the file into smaller segments allows for more manageable processing, preventing memory overload. Progressive uploads, where the user can see upload progress in real-time, provide valuable feedback and prevent users from losing their upload data.
Using a background process can further streamline the upload.
Error Handling for File Operations
Proper error handling for file operations is paramount. A robust system should gracefully handle errors such as invalid file types, exceeding storage limits, or server issues. This includes clear error messages to the user, logging errors for debugging, and preventing potential security vulnerabilities. Implementations should include explicit checks for file size limitations and file type restrictions, preventing unexpected behavior.
This approach ensures the system’s resilience and reliability.
Best Practices for User Errors
Preventing user errors during the upload process is crucial. Clear instructions, validation checks, and informative feedback can significantly reduce errors. These practices enhance user experience and prevent frustration. A well-designed form should include detailed instructions and validation to ensure the user is uploading the correct file type and within the permissible size limits. Implementing visual cues, such as progress bars, can enhance the user experience.
- Validate File Types: Implement checks to ensure uploaded files conform to acceptable formats. This prevents issues with incompatible file types and potential security risks.
- Limit File Size: Set reasonable limits on file sizes to avoid overwhelming server resources. Provide clear messages to users if their files exceed these limits.
- Provide Feedback: Give users clear and concise feedback during the upload process, including progress updates and confirmation messages.
- Handle Unexpected Errors: Develop mechanisms to catch unexpected errors and display informative error messages to the user, preventing the upload from being interrupted or failing silently.
User Interface Considerations for File Upload Forms

A user-friendly file upload form is crucial for a positive user experience. Poorly designed forms can lead to frustration and abandonment. A well-structured form guides users through the process, minimizing errors and maximizing efficiency. This section explores essential UI considerations for building effective file upload forms in WordPress.A visually appealing and intuitive interface is paramount for a smooth upload experience.
Users should easily understand the form’s purpose and how to complete it. Clear instructions, proper labeling, and appropriate feedback mechanisms significantly enhance user satisfaction and reduce support requests.
Intuitive Form Design
Clear instructions and labels are essential for user comprehension. Use descriptive labels for file input fields, explicitly stating the expected file type. Visual cues like icons or color coding can further enhance clarity. Providing examples of acceptable file types helps users avoid errors. For example, a form for product images might include a visual representation of acceptable image formats, like JPEG, PNG, or GIF.
Feedback During Upload
Providing feedback during the upload process is vital. A progress bar, displaying the upload percentage, keeps users informed about the upload status. Visual cues like a loading animation, especially for larger files, maintain user engagement. If the upload fails, provide clear and actionable error messages.
Displaying File Size Limits
Explicitly displaying file size limits is critical. Users should understand the maximum allowed file size upfront. Use a clear and concise format, such as “Maximum file size: 10MB,” avoiding ambiguity. Clearly communicate any consequences if a file exceeds the limit, such as the inability to upload.
Error Handling and Messages
Error messages should be informative and user-friendly. Instead of generic error codes, provide specific reasons for upload failures. For instance, an error message for an invalid file type should be more detailed than “File type not allowed.” A message like “Only .jpg, .png, and .gif images are accepted” is much more helpful.
Example Scenarios and Error Messages
- Invalid File Type: “The uploaded file is not a supported file type. Please upload a file with a .jpg, .png, or .gif extension.”
- File Size Exceeded: “The uploaded file exceeds the maximum allowed size of 10MB. Please reduce the file size and try again.”
- Server Error: “An error occurred on the server. Please try again later. If the problem persists, contact support.”
- Network Issue: “A network issue prevented the file from being uploaded. Please check your internet connection and try again.”
Integration with WordPress Media Library
Integrating uploaded files directly into the WordPress media library offers significant advantages, streamlining file management and improving organization. This method allows users to easily access and re-use uploaded files across various posts and pages, eliminating the need for redundant storage. It also leverages WordPress’s built-in media management tools, enhancing the user experience.The key to this integration lies in utilizing WordPress’s existing media handling mechanisms.
By leveraging these tools, developers can seamlessly add uploaded files to the media library, enabling easy association with content and promoting a more unified file management system within the WordPress platform. This approach is preferred for its compatibility with WordPress’s built-in functionalities and its inherent user-friendliness.
Methods for Integrating with the Media Library
The most common approach involves utilizing WordPress’s built-in `wp_insert_attachment()` and `wp_insert_post()` functions. These functions allow for the creation of attachment records within the media library, which then can be linked to posts or pages. This method ensures consistency with WordPress’s core functionality.
Automatically Adding Uploaded Files to the Media Library
A crucial aspect of this integration is automating the process of adding uploaded files to the media library. This is achieved by calling the `wp_insert_attachment()` function within the file upload form’s handling process. This function takes the uploaded file, its metadata, and other relevant information as parameters, creating a new attachment record in the media library.
Benefits and Drawbacks of Integration
This method has several advantages: improved organization, easier file access, and seamless integration with existing WordPress functionality. However, developers must carefully consider potential drawbacks, such as increased complexity in the upload process and potential conflicts with existing custom code. Thorough testing and careful code implementation are vital.
Associating Files with Posts or Pages
After adding a file to the media library, you can associate it with specific posts or pages. This is done by using the `set_post_thumbnail()` function to link the attachment ID with the relevant post. This establishes a clear relationship between the uploaded file and the content it supports.
Creating a Custom Meta Box for File Management
A custom meta box can be created to provide an intuitive interface for managing files associated with posts or pages. This meta box can list available files in the media library, allowing users to easily select and associate files with their content. This approach enhances the user experience and provides a more structured method for file management within WordPress.
The meta box can present the list of available files, facilitating the selection process.
Closing Summary
In conclusion, creating a file upload form in WordPress is a multifaceted process requiring careful consideration of security, user experience, and technical implementation. By combining custom code with reliable plugins and adhering to best practices, you can develop a secure and user-friendly form. Remember to prioritize security and validate user inputs to avoid vulnerabilities. This guide has provided a strong foundation, equipping you to confidently build and implement your own file upload system.