
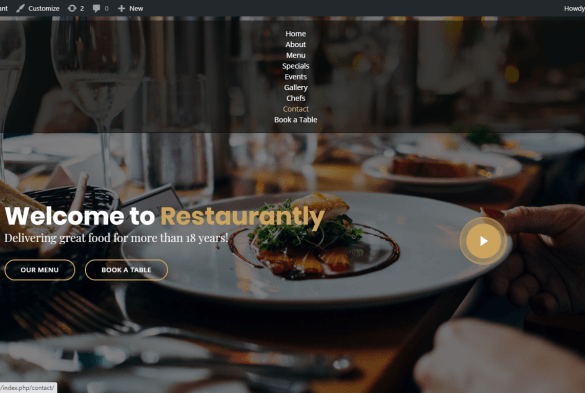
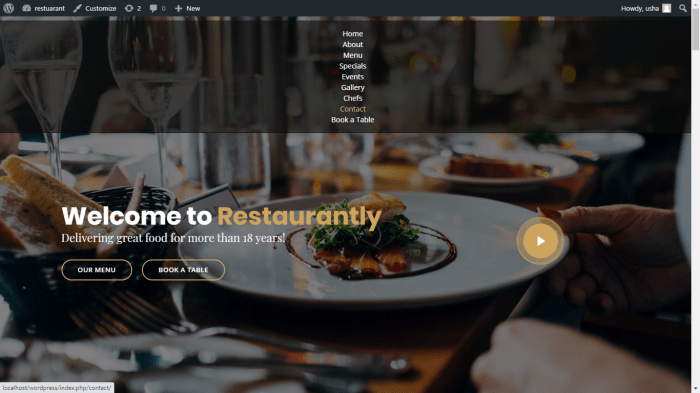
How to add custom navigation menus in WordPress themes? This guide dives deep into crafting unique and user-friendly navigation experiences for your WordPress website. We’ll explore various methods, from simple adjustments to complex customizations, ensuring your site’s menu perfectly reflects your brand and enhances user engagement. Forget generic menus – learn how to create visually appealing and highly functional navigation that sets your website apart from the competition.
WordPress themes provide a solid foundation, but often their default navigation isn’t tailored to specific needs. Custom menus allow for greater control over layout, design, and functionality, leading to a more intuitive and enjoyable user experience. This comprehensive guide will walk you through the entire process, from initial setup to advanced customization options, empowering you to create navigation that perfectly complements your website’s design and goals.
Introduction to Custom Navigation Menus in WordPress Themes

WordPress themes are the visual skins that dictate how your website looks and functions. They provide a framework for content organization, navigation, and overall design, allowing you to customize the appearance of your website without needing to write extensive code. A crucial element of a user-friendly website is a well-designed navigation menu. This allows visitors to easily browse through the content and find what they’re looking for.Custom navigation menus offer significant advantages over the default WordPress navigation, providing a more tailored and visually appealing user experience.
Want to supercharge your WordPress theme’s navigation? Adding custom menus is a surprisingly straightforward process. It’s all about organizing your website’s content in a user-friendly way, which directly impacts your lead generation efforts. Understanding the lead generation process, like how content marketing and lead generation work, is key to driving traffic and conversions. For a deeper dive into that topic, check out this helpful resource on the lead generation process how content marketing and lead generation work.
Once you’ve grasped that, you’ll be able to craft a navigation structure that supports your content marketing strategy and makes your site a joy to explore. Finally, customizing your WordPress menus will ultimately help guide visitors to the key pages that generate leads.
They allow for greater control over the website’s structure and design, and can be optimized to match the specific needs and style of your website.
Significance of Custom Navigation Menus
Custom navigation menus are essential for enhancing the user experience on your website. They allow you to organize website content in a way that’s logical and intuitive for visitors. This clear and structured navigation aids in improving user engagement and site usability, leading to a higher likelihood of visitors finding what they need. This improved experience, in turn, positively impacts search engine rankings and fosters a more positive user impression of your website.
Custom Navigation Menus vs. Default WordPress Navigation
Default WordPress navigation menus are often pre-defined and may not align perfectly with the specific design or structure of your website. Custom menus, on the other hand, provide complete control over menu items, their order, and their visual presentation. This control allows for a highly tailored and cohesive experience that is aligned with the overall website aesthetic. Custom menus enable you to create menus that are more specific and targeted, which can lead to better user engagement and more efficient website navigation.
Benefits of Custom Navigation Menus
Custom navigation menus offer a variety of advantages over the default WordPress options. They provide greater flexibility in layout, style, and functionality. They allow for the inclusion of specific items or categories that are relevant to your website’s content. This leads to improved site structure and clarity, making it easier for users to find information. Further, custom menus can be customized to match your brand’s identity and aesthetic, providing a consistent and unified look across the entire website.
They also enable more advanced features like drop-down menus and submenus, improving the overall user experience.
- Enhanced User Experience: Custom menus allow for more intuitive and user-friendly navigation, resulting in increased engagement and satisfaction.
- Improved Site Structure: Custom menus enable a more logical and organized website structure, improving clarity and searchability.
- Brand Consistency: Tailored menus maintain brand consistency and create a cohesive website aesthetic.
- Advanced Features: Custom menus allow for features like drop-down menus and submenus, increasing the website’s navigation depth.
Examples of Effective Custom Navigation Menus
Many websites leverage custom navigation menus to create a superior user experience. For example, e-commerce sites often use custom menus to categorize products effectively, allowing users to easily find the specific items they are looking for. Similarly, blogs and news websites can use custom menus to categorize articles, ensuring visitors can quickly access specific content. Furthermore, websites with complex structures, like those in the corporate or educational sectors, can use custom navigation to clearly delineate sections, enhancing the overall experience.
Methods for Creating Custom Navigation Menus
WordPress’s built-in navigation menus are flexible, but sometimes you need more control. Custom navigation menus offer a powerful way to tailor your theme’s menu structure, integrate dynamic content, and enhance user experience. This section explores various methods for achieving this, highlighting their strengths and weaknesses.Adding custom navigation menus empowers you to structure your website’s content in a way that aligns perfectly with your design and functionality.
It allows for more intricate and adaptable menu layouts compared to the default options, enhancing user navigation and providing a more polished user experience.
Using functions.php
This method involves directly modifying your theme’s `functions.php` file. It provides maximum control, allowing for intricate menu manipulations and integration with custom functions. This approach, though powerful, demands a deeper understanding of PHP and theme development.
- This approach offers the greatest level of customization and integration with other parts of your theme. You have direct access to all WordPress functions and can manipulate the menu structure in virtually any way you need. It is very powerful for developers who are comfortable with PHP.
- Implementing a custom menu using functions.php often requires careful attention to detail, as any errors can disrupt the functionality of the theme. It demands a deeper understanding of PHP.
Example snippet for adding a custom menu using functions.php:“`phpfunction register_my_menus() register_nav_menu(‘custom-menu’, __(‘Custom Menu’));add_action(‘init’, ‘register_my_menus’);function add_custom_menu_link($items, $args) if ($args->theme_location == ‘custom-menu’) $items[] = array( ‘title’ => ‘Contact’, ‘url’ => ‘contact.php’, ‘attr’ => array( ‘class’ => ‘custom-link’ ) ); return $items;add_filter(‘wp_nav_menu_objects’, ‘add_custom_menu_link’, 10, 2);“`
This code snippet registers a new menu location called ‘custom-menu’. It then adds a custom link to that menu. Adjust the `title`, `url`, and `attr` values to match your needs.
Using the Theme Customizer
The Theme Customizer provides a user-friendly interface for managing menus within the WordPress dashboard. This approach is ideal for non-technical users or those seeking a streamlined process.
- The Theme Customizer offers a visual, drag-and-drop interface to manage menus. This simplifies the process for users with limited technical skills.
- While straightforward, the Theme Customizer may not provide the same level of customization as directly editing `functions.php`. Some advanced menu manipulations might require more technical means.
No specific code snippet is needed here. WordPress handles the menu creation and display using its built-in functionality. You simply add menu items through the interface.
Creating Hierarchical Menus
Both methods allow for hierarchical menu structures. Simply nest menu items within the menu’s hierarchy when creating or editing the menu in the Customizer or by using the `wp_nav_menu` function.
- Creating a hierarchical menu structure using the Customizer is a straightforward process, mirroring the parent-child relationship. This is done visually.
- With the `functions.php` method, you have full control over the hierarchical relationships, making it possible to programmatically manage the menu structure.
Comparison Table
| Method | Pros | Cons | Complexity |
|---|---|---|---|
| functions.php | Maximum customization, integration with theme functions | Requires PHP knowledge, potential for errors | High |
| Theme Customizer | User-friendly interface, easy to manage | Limited customization options | Low |
Adding Custom Menu Items
Adding custom menu items to your WordPress theme’s navigation menus is a crucial aspect of theme customization. This allows you to tailor the menu structure to perfectly match your website’s content and user flow. Whether you need to include a new blog category, add a custom page, or incorporate dynamic elements, this process ensures a seamless user experience.This section delves into the practical steps for creating and managing custom menu items, including those that adjust based on user roles or other conditions.
We’ll cover everything from basic menu links to advanced dynamic item configurations, providing a comprehensive understanding of this essential theme development task.
Creating Custom Menu Links
Adding new menu items involves understanding how WordPress handles menu structures. Each menu item is essentially a link, defining the destination and presentation. You need to identify the target URL for the link and craft the text that users will see in the menu.
Adding Menu Items with Attributes
WordPress allows for the addition of attributes to menu items, enhancing their functionality and appearance. These attributes extend beyond basic URL targeting and can include CSS classes for custom styling, or target specific frames or windows.
- Target Attribute: This attribute specifies where the link should open. For example, setting
target="_blank"will open the linked page in a new browser window or tab. - Class Attribute: Using CSS classes, you can add custom styles to individual menu items. This allows for granular control over the menu’s appearance and differentiates menu items based on their function.
Handling Dynamic Menu Items
Certain menu items may need to appear or disappear based on user roles or other conditions. For example, a menu item related to administrative functions should only be visible to administrators. This dynamic behavior is essential for maintaining a tailored user experience.WordPress offers flexibility in this area through its various functions and hooks. By using conditional logic within your theme’s functions.php file, you can create menu items that are displayed or hidden based on specific conditions.
This ensures that users only see relevant menu options, improving site usability.
Using the `wp_nav_menu` Function
The `wp_nav_menu` function is central to displaying custom menus. This function takes arguments that control the appearance, structure, and content of the menu.
Figuring out how to add custom navigation menus in WordPress themes is pretty straightforward. You’ll need to understand the theme’s structure and how to manage those menus within the WordPress dashboard. However, when you’re looking to expand your reach beyond your website, and start focusing on paid advertising, you need to carefully consider your budget allocation. Knowing when to choose Google Ads versus Meta Ads is crucial for maximizing your ROI, and this excellent guide can help you with that: budget allocation when to choose google ads vs meta ads.
Once you’ve nailed down your budget strategy, you can go back to fine-tuning those WordPress navigation menus for optimal user experience.
- Menu Location: Specify the location where the menu should be displayed. The menu location parameter in the `wp_nav_menu` function tells WordPress which menu to display in a particular area of the theme.
- Menu Items: The `wp_nav_menu` function takes a `menu` argument that controls the menu displayed. The `menu_class` and `menu_id` arguments control the CSS classes and IDs used to style the menu.
Example of Dynamic Menu Items
Imagine a menu item that displays a specific link only for users with administrator privileges. This can be achieved by incorporating conditional statements within your theme’s functions.php file to conditionally add menu items based on user roles.
function add_custom_menu_item()
  if (current_user_can('administrator'))
    wp_add_nav_menu_item(
      [//your menu item parameters]
    );


add_action('init', 'add_custom_menu_item');
This code snippet demonstrates how to dynamically add a menu item based on the user’s role. The `current_user_can` function is essential for determining the user’s role and permissions. This ensures that only administrators see the menu item, enhancing the user experience by only showing relevant options.
Styling and Positioning Custom Navigation Menus
Custom navigation menus in WordPress themes aren’t just functional; they’re a crucial part of the user experience. Visually appealing menus guide visitors effectively through your site, improving engagement and overall satisfaction. This section delves into the art of customizing these menus, allowing you to tailor their appearance and placement to match your theme’s aesthetic and enhance the user journey.
The core principles behind styling navigation menus lie in using CSS. This gives you granular control over every aspect, from colors and fonts to the overall layout. By understanding the underlying CSS structure, you can fine-tune your menus to perfectly integrate with your theme and create a cohesive design.
Customizing Menu Appearance with CSS
CSS offers a powerful toolkit for transforming your navigation menus. Directly targeting the menu elements allows for precise control over the look and feel of each item. This precise control ensures that your menu is aesthetically consistent with your theme.
- Targeting Specific Menu Items: Using CSS selectors, you can target specific menu items, such as the main menu items or submenu items. This targeted approach lets you apply unique styles to different menu levels. For example, you could use class selectors or ID selectors to distinguish between the main menu and submenu items.
- Color and Font Customization: CSS allows you to control the color and font attributes of your menu items. You can adjust text colors, background colors, and font sizes. Applying specific colors to each menu level or section further enhances visual hierarchy and clarity.
- Adjusting Font Sizes and Styles: You can modify font sizes, weights, and styles to match your theme’s typography. Consider the overall visual language of your site when adjusting these elements.
Positioning the Menu in the Layout
The placement of the navigation menu within your theme’s layout is crucial. Appropriate positioning ensures usability and seamless integration with the rest of the site’s content.
- Using CSS Positioning Properties: Positioning properties like `position: absolute`, `position: relative`, and `position: fixed` allow for precise control over the menu’s location on the page. Understanding these properties enables you to place the menu above, below, or beside other page elements, or even overlaying them.
- Utilizing Margins and Padding: Adjusting margins and padding around the menu controls spacing, preventing the menu from overlapping content. Precise spacing can create a clean and uncluttered layout.
- Responsive Design Considerations: Ensure your menu styling adapts to different screen sizes. Use media queries in your CSS to adjust the menu’s appearance based on the device’s width. This approach ensures a seamless experience across various screen sizes.
Styling Different Menu Levels
Distinguishing between different menu levels (main menu, sub-menus) is crucial for creating a clear hierarchy. A well-structured menu with visual differentiation enhances user navigation and improves readability.
- Using Pseudo-classes: Pseudo-classes like `:hover`, `:focus`, and `:visited` can be used to style menu items on hover, focus, or when they’ve been visited. This creates interactive visual cues and highlights the menu item as the user interacts with it.
- Applying Unique Styles to Submenus: Use CSS selectors to target submenu items and apply unique styles to distinguish them from the main menu. Consider using different colors, fonts, or spacing to visually separate submenus from the main menu, emphasizing the hierarchical structure.
CSS Properties for Menu Styling, How to add custom navigation menus in wordpress themes
This table illustrates various CSS properties and their effects on menu appearance. Choosing the right properties allows for precise customization to achieve the desired aesthetic.
| CSS Property | Effect |
|---|---|
color |
Sets the text color of the menu items. |
background-color |
Sets the background color of the menu items. |
font-size |
Adjusts the size of the menu text. |
font-family |
Changes the font used for the menu text. |
padding |
Adds spacing around the menu items. |
margin |
Adds spacing between menu items. |
list-style-type |
Modifies the bullet point style for the menu items. |
text-align |
Controls the alignment of the text within menu items. |
Handling Responsive Design
Responsive design is crucial for any website, especially WordPress themes, to ensure a seamless user experience across various devices. A website that adapts to different screen sizes (desktops, tablets, smartphones) prevents frustration for users and boosts search engine optimization (). Custom navigation menus, in particular, need to be responsive to maintain usability and visual appeal.Adapting navigation menus for different screen sizes involves more than just shrinking text.
It necessitates adjusting layout and structure to optimize the user interface. This approach ensures that users can easily access the information they need, regardless of the device they are using. Methods for achieving this include media queries, flexible grid systems, and thoughtful UI design.
Importance of Responsive Navigation
A responsive navigation menu enhances user experience. It allows users to easily browse the website on any device, avoiding the need to pinch, zoom, or scroll excessively. A responsive design contributes to a positive user experience, directly influencing user engagement and potentially conversion rates. Further, responsive navigation is a key factor in search engine rankings. Search engines favor websites that provide a good experience across various devices, which translates to higher organic traffic.
Methods for Adapting Navigation Menus
Various methods can be employed to make navigation menus responsive. The most common approach is utilizing media queries in CSS. Media queries allow you to target different screen sizes and apply specific styles. This allows you to tailor the menu layout, font sizes, and positioning for each device. Another key method is using flexible grid systems.
These systems automatically adjust the layout based on the screen width, allowing for a seamless transition between different screen sizes.
Using Media Queries in CSS
Media queries are powerful tools for making your navigation responsive. They let you define different styles based on the screen width, orientation, or other characteristics. For example, you might use a horizontal navigation bar on larger screens and a vertical collapsible menu on smaller screens. The following is a simplified example:“`CSS@media (max-width: 768px) nav ul display: block; /* Stack list items vertically – / width: 100%; text-align: center; /* Center-align items – / nav li display: block; margin-bottom: 10px; nav a padding: 10px; “`This code snippet targets screens with a maximum width of 768 pixels.
It changes the navigation from a horizontal list to a vertically stacked list, centered on the page, improving usability on smaller screens. You can adjust the `max-width` value to target different breakpoints.
Responsive HTML Table Example
A responsive HTML table can be a valuable component for presenting navigation, especially when combined with CSS media queries. This allows for a more structured layout.“`HTML
| Navigation Item |
|---|
| Home |
| About |
| Services |
| Contact |
“`This simple table structure can be further enhanced with CSS to create a responsive navigation bar. The table cells can be styled to become navigation links, and media queries can be used to change the layout for different screen sizes, ensuring a smooth transition between screen sizes. For example, on smaller screens, the table rows could stack vertically.
Adding custom navigation menus in WordPress themes is pretty straightforward, but sometimes you need to think about how your target audience will interact with your site. For example, if you’re running Google Ads campaigns, you’ll need to be aware of country restrictions on the campaign level, like google ads and country restrictions on the campaign level. Knowing these restrictions can help you craft navigation that’s tailored to specific regions, ensuring a smooth user experience and ultimately, a better user journey, which is key for your WordPress site’s functionality.
Advanced Customization Options
Customizing WordPress navigation menus goes beyond simple item placement and styling. Advanced techniques unlock greater flexibility and interactivity, allowing you to tailor the menu experience to your site’s specific needs and aesthetic. These techniques leverage custom classes, IDs, and JavaScript, enabling dynamic behavior and unique visual elements.By implementing these advanced strategies, you can create menus that seamlessly integrate with your theme’s design and provide a richer user experience.
This section delves into powerful methods for creating dynamic and visually engaging navigation systems.
Custom Classes and IDs for Menu Items
Assigning custom classes and IDs to menu items allows for targeted styling and JavaScript interactions. This granular control enables the application of unique styles to specific menu elements. For example, you might apply a class to all menu items in a particular category, or a specific ID to a ‘contact us’ link. This precision enhances theme customization, enabling a unique visual representation for each menu item, and aids in JavaScript manipulation.
Careful consideration of naming conventions is key for maintainability and readability.
Custom Menu Items with Icons or Images
Expanding upon the standard text-based menu items, you can incorporate icons or images to enhance visual appeal and user understanding. This method is particularly valuable for conveying context or adding a unique touch to the navigation. WordPress’s flexibility enables the integration of various icon libraries and image formats, offering numerous options for visual representation. This approach enhances the user interface, providing visual cues and a more intuitive navigation experience.
JavaScript for Interactive Navigation Menus
JavaScript allows for dynamic interactions within the navigation menu. This includes features like dropdown menus, animated transitions, or highlighting active links. Implementing these interactions improves the user experience, creating a more engaging and responsive menu system. Sophisticated JavaScript libraries and frameworks can further enhance the visual and functional capabilities of the navigation, improving the user’s experience with your website.
Custom Plugins or Code Snippets for Advanced Features
Custom plugins and code snippets provide a powerful way to implement advanced navigation features not readily available through core WordPress functions. These add-ons can include features like custom menu item types, advanced search integration, or even the integration of third-party services into the menu. By leveraging these tools, developers can create unique and tailored navigation systems, adapting to specific site requirements.
Such plugins often extend the basic functionality, creating specialized navigation components and functionalities.
Example: Adding a Custom Menu Item
 'Custom Page',
      'menu-item-url' => 'http://example.com/custom-page',
      'menu-item-status' => 'publish'
    )
  );

add_action( 'init', 'add_custom_menu_item' );
?>
This code snippet demonstrates how to dynamically add a new menu item. The `wp_update_nav_menu_item` function is used to modify an existing menu, adding a new entry with a title, URL, and publication status.
The `add_action` hook ensures the function runs during the `init` phase of WordPress. The example uses the `$menu_id` constant to ensure the code targets the desired menu.
Troubleshooting Common Issues
Custom navigation menus are a crucial part of any WordPress website, but sometimes problems arise. This section will address common issues you might encounter during the creation and implementation of custom navigation menus, along with practical solutions. Understanding these troubleshooting steps can save you significant time and effort when encountering unexpected behavior.
Often, problems with custom menus stem from misconfigurations in theme files, conflicting plugins, or incorrect menu item settings. A methodical approach to diagnosis and resolution is key to identifying and fixing these issues quickly.
Identifying Menu Display Problems
Incorrect menu display can manifest in various ways, such as menus not appearing at all, displaying in the wrong location, or exhibiting unexpected formatting. Thorough inspection of the theme’s code and the menu settings is crucial for accurate diagnosis.
- Missing Menus: Verify that the menu you’ve created is properly assigned to a location in your theme’s customizer. Double-check that the theme supports navigation menus and that no conflicting plugins are interfering with the menu display. Also ensure the menu is selected as the primary menu in the theme’s settings if required.
- Incorrect Location: If the menu appears in an unexpected spot, review the theme’s template files to confirm the menu is being correctly called in the appropriate template. Check for any custom CSS that might be overriding the default menu styles. Examine the theme’s documentation or support forum for guidance specific to your theme.
- Formatting Issues: Problems with menu formatting often result from conflicting CSS. Examine the theme’s CSS to determine if there are any rules targeting the menu element. If needed, use a browser’s developer tools to pinpoint the source of the conflict.
Functionality-Related Issues
Difficulties with menu functionality might involve broken links, missing items, or unresponsive menu items. These issues often stem from incorrect menu item configurations or errors in the underlying theme structure.
- Broken Links: Ensure that all menu items have valid URLs or target appropriate pages, posts, or custom post types. Check for typos in the URLs or incorrect menu item settings.
- Missing Items: Verify that all menu items you’ve added are correctly saved and assigned to the menu. Confirm the menu is being correctly used in the theme’s template files. Verify the status of any plugins that might impact menu management.
- Unresponsive Items: Examine the theme’s JavaScript files for potential conflicts that might cause menu items to be unresponsive. Check for conflicting plugins or theme settings that could interfere with menu functionality.
Responsive Design Issues
Ensuring custom navigation menus function seamlessly across different devices is critical. Responsive design issues often stem from misconfigurations in CSS, or the lack of media queries to adapt to different screen sizes.
- Viewport Issues: Verify the theme’s CSS includes media queries for different screen sizes. Examine how the menu collapses or restructures on smaller screens. Consider using browser developer tools to examine the menu’s behavior in different viewport sizes.
- Layout Shifts: If the menu layout shifts unexpectedly on different devices, check the theme’s responsiveness settings. Use browser developer tools to examine how elements interact on different screen sizes and potentially adjust the theme’s CSS.
- Mobile Menu Functionality: Verify the mobile menu, if implemented, is functioning correctly. Check for JavaScript errors or incorrect configurations.
Using WordPress Debug Tools
WordPress provides debugging tools to help diagnose and resolve technical issues. These tools can provide insights into errors in the theme’s code, plugin conflicts, or database problems.
- Activating Debug Mode: Enable WordPress’s debug mode in `wp-config.php` to reveal error messages. This helps identify potential issues with the theme, plugins, or database queries.
- Examining Error Logs: Check the WordPress error logs for detailed information about any errors that occurred. This provides insights into the source of the problem and allows you to identify specific issues affecting the menu.
- Using the Database: Review the database tables relevant to the menu to ensure data integrity. Check the `wp_options` table for menu settings and the `wp_terms` table for categories or tags associated with the menu items.
Last Recap: How To Add Custom Navigation Menus In WordPress Themes
In conclusion, customizing your WordPress navigation empowers you to create a truly unique and user-focused website. This guide has covered various methods for adding custom menus, styling them effectively, and ensuring responsiveness across devices. By implementing the techniques and tips Artikeld, you can elevate your website’s navigation to a new level of functionality and aesthetics. Now go forth and craft navigation that delights your visitors!